
Last updated November 18, 2026
 Hardwood
 Engineered hardwood
 Luxury vinyl plank
 Laminate
 Porcelain tile
 Carpet
 Shaw
 Mohawk
 COREtec
 Pergo
Free in-home measure and written estimate: Shaw, Mohawk, COREtec and Pergo lines compared on your own rooms, with carpet, tile, vinyl plank, laminate and hardwood laid out side by side
Get your free estimateHow to Prepare Your Home for a Flooring Installation in Boulder City
Most flooring problems that show up after the job is done aren’t actually about the flooring. They trace back to the day before the first plank dropped, when the room wasn’t emptied, the slab wasn’t checked, or the new material sat stacked in a corner while the house cooked at 85 degrees with the windows open. The prep work is the homeowner’s half of the project, and it’s the half nobody explains clearly. This guide walks through exactly what “ready” means before a flooring crew arrives in Boulder City, what you’re expected to move yourself, and how to time the job so it doesn’t collide with paint, baseboards, or the appliances still plugged into the wall.
Quick Answer
To prepare for a flooring installation in Boulder City, clear the room of furniture and valuables, remove old floor coverings and any tack strips, confirm the subfloor is flat, dry, and structurally sound, and let new material sit in the room at normal living temperature before install day. Coordinate adjacent trades like baseboards and paint either before the floor goes down or immediately after, and make sure the home’s climate control is running normally, not off. Doing those things is what keeps the written estimate from growing once the crew is on site.
Styles & brands we work with
- Hardwood
- Engineered hardwood
- Luxury vinyl plank
- Laminate
- Porcelain tile
- Carpet
- Shaw
- Mohawk
- COREtec
- Pergo
Table of Contents
- Why acclimation matters in Boulder City’s dry climate
- What “subfloor ready” actually means
- Room-clearing: what you move vs. what the crew handles
- Climate control and HVAC requirements during the install
- Coordinating baseboards, paint, and toe kicks
- Preparing for a hardwood refinish instead of a new floor
- A realistic week-of checklist
- Common mistakes to avoid in Boulder City homes
Why Acclimation Matters in Boulder City’s Dry Climate
Flooring material needs time in your home before it goes down. For hardwood and engineered wood, that open time is not a formality: pressboard and real wood both pick up and shed moisture, and they have to settle into equilibrium with the air in the room where they’ll live. Skip it and you can end up with gaps along a seam or a board that cups a month after the crew leaves. The instruction sheet packaged with your specific product will give you the exact period the manufacturer calls for, and the written estimate should confirm what’s expected of the room in that window.
Why this matters more in Boulder City than in a lot of places: the desert climate here swings hard between dry summer air and the cooler, slightly wetter winter months. Wood installed in January and then hit with July heat can behave differently than wood installed when the air is at its driest. Engineered wood handles those swings better than solid, and luxury vinyl products like COREtec and Pergo don’t need acclimation in the same way because they aren’t wood, though they do still need the room at a consistent temperature before cutting.
What acclimation looks like in practice:
- Have the boxes or bundles delivered to the room two to three days before installation is scheduled. Not the garage. Not an unheated storage area.
- Open the packaging so air can circulate around the material, unless the manufacturer explicitly says to leave it sealed.
- Run the HVAC at normal living temperature for the whole acclimation period. That’s typically around 70 degrees, not 60 and not 85.
- Keep the room’s doors closed but the air system on. Avoid leaving windows open to dry desert breezes, which fight the room’s balance.
- Note the date you unboxed the material. The installer may ask to confirm the product has had its time.
If the room has been empty and baking in the afternoon sun with the heat off, the material needs longer, not less. Skipping or shortening this step can make the manufacturer’s coverage of the product difficult to rely on if a problem shows up later, because the product’s own instructions set that requirement. If you aren’t sure how long your specific floor needs, ask at the estimate visit rather than guessing. Taking an extra day is cheap. Replacing a floor that moved is not.
What “Subfloor Ready” Actually Means
“Flat” and “level” aren’t the same thing, and the flooring trade cares about flat. A floor can slope toward a drain and still be perfectly flat, and a floor can be level while rippling like a sheet of water. Most flooring products need the subfloor flat within a small tolerance over a given distance, and each product’s instruction sheet sets that figure. Planks that span a dip will flex, click, and eventually separate; tile that spans a dip will crack. The installer checks flatness at the estimate, not on install day.
Three things need to be true before the floor goes down:
- Flatness. Measured across the room by the installer. If it’s out, the fix is usually a self-leveling compound or a skim coat, and that’s a separate step that adds time.
- Soundness. Loose boards, soft spots, squeaks, and any hollowness underfoot get re-fastened or replaced before the new floor hides them permanently.
- Dryness. Concrete slabs need a moisture check, because moisture coming up from below is the single most common reason a new floor fails early. The product’s instructions set the acceptable reading.
Cracks and chips in a slab are usually fine to fill before a new floor goes over them. What matters is whether the crack is stable or still moving; a crack that has widened since the last time you looked is a structural question, not a flooring one, and worth flagging to your installer at the estimate. If you want a deeper walkthrough of what the crew does once the room is ready, our page on tile flooring installation shows how that process plays out room by room.
Tile is the least forgiving surface here. It needs a flat, stable, dry substrate or the grout joints will telegraph the movement. That’s why Daltile’s porcelain and ceramic lines, which we carry for residential projects, are specified by the installer against the substrate conditions found at the estimate, not the other way around.
Room-Clearing: What You Move vs. What the Crew Handles
This is the part of the contract that surprises the most homeowners. On a standard residential job, clearing the room is the homeowner’s responsibility. That means furniture, rugs, wall art, floor lamps, plants, and the box of things that lived under the bed. Crews can and often do move appliances like a refrigerator or washer when the flooring runs beneath them, but that’s usually spelled out separately and should be confirmed in the estimate, not assumed.
What to handle yourself before the crew arrives:
- Empty the room completely. Anything left in the way slows the job.
- Move small valuables, electronics, and anything breakable to another part of the house, not just to the hall.
- Unplug and move freestanding appliances unless your estimate lists them as part of the job.
- Take down curtains, wall hangings, and anything that could catch dust during the work.
- Clear the path to the room from the front door and around any stairs the crew has to use.
Protecting the rest of the house is usually the crew’s job, but you can help. Appliances and cabinetry that stay in place during a slab job are wrapped or taped off, and the doorways are sheeted. If the project runs through a kitchen, plan to be without the appliances for at least the working day, and empty the fridge ahead of time if it’s getting moved so nothing warms up while it’s unplugged.
Disposal of the old floor is another line item that varies. Many estimates include hauling away old carpet or vinyl; some list it separately. Ask the question before you sign. If you’re removing old carpet yourself, remember that tack strips along the wall are sharp, and pulling them up is the safest part of the job to hire out rather than handle bare-handed.
You can also see how a typical carpet removal and replacement plays out on our carpet installation page, which covers the same clearing and disposal questions specific to soft flooring.
Climate Control and HVAC Requirements During the Install
The house needs to be at normal living temperature during installation, not empty and baking at 85. This is a real problem in Boulder City in summer, when an unoccupied house with the air conditioning off can climb well past 100 inside by early afternoon, and in winter, when a home that hasn’t had the heat on in weeks is noticeably cooler than it will be when someone is living there. Wood, engineered flooring, and adhesive all react to that swing.
What to plan for:
- Have the HVAC running and set to the same temperature you’d keep it at if you were home.
- Keep windows closed during the working hours, both for temperature and for the dust that gets stirred up.
- If a room addition or a recently finished space has no system yet, tell your installer at the estimate; portable units can be discussed, but the product’s instructions set what’s acceptable.
- Continue running the HVAC for several days after the install, through the period when adhesive cures and wood settles.
If the job is happening over multiple days, don’t shut the system off overnight. The temperature swing between an empty house cooling to 65 overnight and rocketing to 95 by afternoon is the kind of cycle that makes a floor move. Adhesive products have their own cure window, and the product documentation is what governs. We don’t override product instructions; we follow them.
Boulder City’s climate also brings dust. The desert surrounding the town is dry and windy, and a home with the windows cracked during installation will pull fine grit into every open box. Keep the house buttoned up.
Coordinating Baseboards, Paint, and Toe Kicks
The flooring is rarely the whole job. If baseboards come off, somebody has to reinstall them; if paint touch-ups are needed, somebody has to match the wall; if a new toe kick goes under the kitchen cabinets, somebody has to cut it. Sequencing those trades badly is where most projects turn into a two-week ordeal instead of a two-day one. The goal is to have the room ready for the floor, then have the finish trades come in behind it, without any of them being called back a third time.
The order that usually works:
- Paint the walls and ceiling first, before flooring, so drips don’t land on the new surface.
- Remove baseboards before the new floor goes down if they’re staying.
- Install the flooring.
- Reinstall baseboards on top of the new floor, or install shorter baseboards so the shoe mold covers the expansion gap.
- Touch up paint along the baseboard line.
- Handle toe kicks and cabinet trim last, once the floor height is actually known.
One scheduling rule saves a lot of friction: don’t book the painter and the flooring crew for the same week. Movement through a room under construction slows both trades down, and a painter who has to work around loose planks and open adhesive buckets will be back. Have the flooring install itself be a single, contained block of days, then bring the finish trades in after. We can talk through sequencing at the estimate, and the written estimate will spell out which of those steps is in scope and which is yours.
Preparing for a Hardwood Refinish Instead of a New Floor
If the wood floor you have is worn, scratched, or just dated, refinishing is often the smarter move than tearing it out and starting over. That’s the angle we tend to lead with, and it belongs in the preparation guide because the prep is completely different. Refinishing means sanding the existing floor down to bare wood, staining or sealing it to your chosen finish, and putting the room back. It doesn’t require acclimation of new material, but it does require a real look at what’s under the old finish.
Before you plan a refinish, understand the limits:
- Every floor can’t be refinished. Whether yours can depends on how thick the wear layer of wood is above the tongue and how much has already been sanded in previous refinishing passes.
- Whether a stain will match a sample or your memory of a photo is a question for the estimate visit, not a promise. Wood species, age, and the existing finish all affect the result.
- Anything glued down or engineered with a thin veneer has a different set of rules than solid wood.
Preparation for a refinish is mostly about containment. Sanding produces a lot of fine wood dust, even with modern extraction, and the room needs to be fully empty, with sealed doorways and any HVAC returns covered. Plan for the household to be without that space for the duration of the job, and if the project runs through multiple rooms, plan the route carefully so you aren’t boxed out of your own kitchen.
If you want to know whether refinishing is the right call for your specific floor before you commit to either path, our team at Flooring Boulder City can walk the floor with you and give you a straight answer at the estimate visit. If the wood is too thin to refinish, we’ll say so.
A Realistic Week-of Checklist
None of this is complicated, but it needs to happen on a schedule. Here’s what the week of an install looks like if the material is arriving for acclimation first and the crew is booked for the end of the week.
- Monday. Confirm the delivery window with your installer. Make sure someone is home to receive material; the boxes or bundles need to come inside, not sit in the driveway in the sun.
- Monday or Tuesday. Empty the room. Move furniture, rugs, and valuables. Check the path the crew will use and clear it.
- Tuesday. Unbox the material and let it acclimate. Confirm the HVAC is set to normal living temperature and will stay there.
- Wednesday. Do a quick visual check of the subfloor yourself. Look for soft spots, visible moisture, or movement in the old floor if it’s staying in place under the new one. Flag anything that concerns you.
- Thursday. Confirm the finish trade schedule with anyone painting or redoing baseboards. Make sure they know the floor comes first.
- Friday. Install day. Have the room ready, the door unlocked, and the plant or pet situation handled. Plan to be reachable but out of the work area; the crew will need to move through the room without an audience.
- The weekend after. Keep the HVAC on. Let the room settle. Do not douse the floor with water or move furniture back until the installer says the finish or adhesive has cured.
Specific timing depends on the product and the size of the job, and the schedule is set at the estimate. There’s no one-size-fits-all here, and a crew that promises otherwise without seeing the room first is guessing.
Common Mistakes to Avoid in Boulder City Homes
- Assuming the crew will move everything. On a standard residential contract, clearing the room is the homeowner’s job. Confirm what’s included at the estimate rather than on install day.
- Stacking new flooring in the garage. Boulder City garages reach extreme afternoon temperatures in summer and can dip near freezing in winter. That swing is exactly what acclimation is meant to smooth out. Material stays inside the conditioned house.
- Shutting off the HVAC to “save money” during the job. An empty house that bakes at 85 in the desert sun will not install cleanly. Wood and adhesive both misbehave, and the product instructions set the acceptable range.
- Painting after the new floor goes in. Drips on a fresh floor are a real problem, and taping off a whole room to paint around it costs more than doing the painting first.
- Skipping the moisture check on a slab. Concrete wicks moisture up from below. A floor installed over a wet slab can look fine for months and then fail from underneath. The product’s instructions set the acceptable reading, and the installer should take it.
- Leaving old carpet tack strips for the crew to discover. Pulling tack strips is sharp, dusty work. If your estimate lists removal, great; if it doesn’t, ask whether it’s included before the day arrives.
- Lining up the painter and the flooring crew for the same week. Two trades in one room slow each other down. Sequence them and the project finishes sooner than it does running in parallel.
See the difference
 Before
 After
 Before
 After
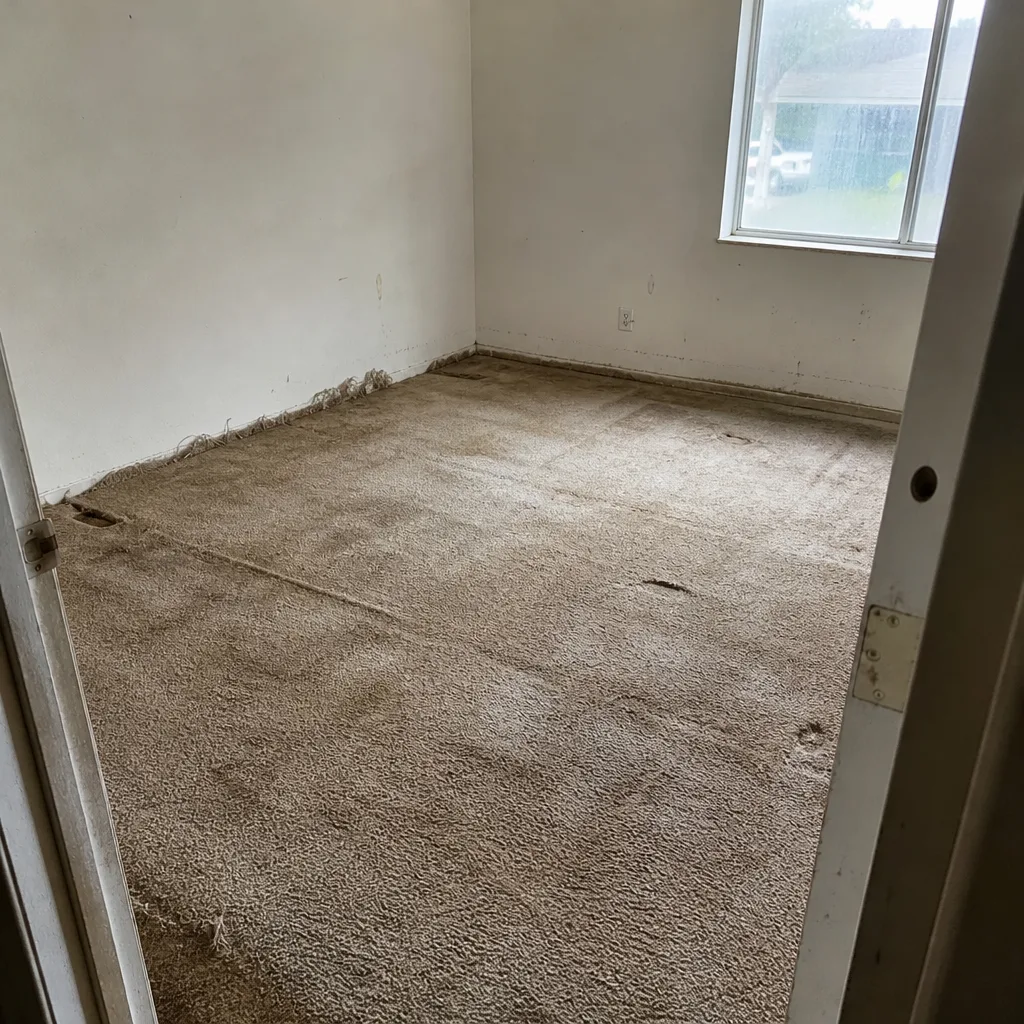 Before
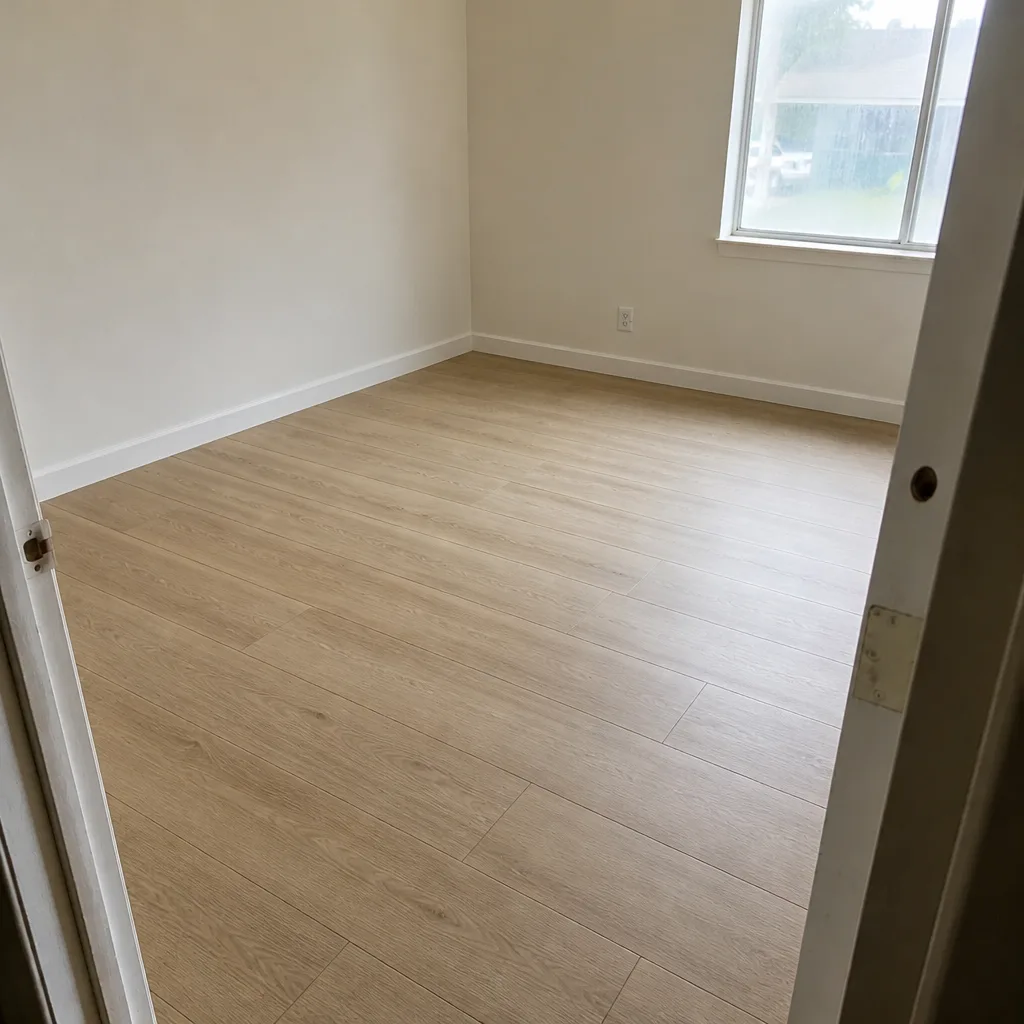 After
When to Call a Professional
There are a handful of situations where DIY preparation stops being safe or sensible. If you suspect moisture coming through a concrete slab, that’s a diagnostic question, not a cleanup one; a reading taken with the right instrument tells you whether the floor can go down at all, and that’s a professional answer. If your existing wood floor has soft spots, visible sagging, or a crack that’s been widening, get it checked before planning any install on top. If you have radiant heat under the slab, the flooring has to be specified for it, which is another conversation for the estimate. And if the room contains an old floor covering you suspect may have been installed decades ago, removal and containment are best handled by trained installers rather than a homeowner with a pry bar.
Flooring Boulder City offers free estimates in Boulder City – call (833) 842-8455 to schedule a visit. We’ll walk the room, check the subfloor, and put the whole scope in writing, including which prep steps are ours and which are yours.
Frequently Asked Questions
Acclimation time depends on the product, and the manufacturer’s instructions set the requirement. For hardwood and engineered wood, the standard is typically a couple of days inside the room at normal living temperature, not in a garage or an unheated space. Because Boulder City’s climate swings between very dry summers and cooler, damper winters, wood occasionally wants a little longer than the package minimum. Your installer will confirm the exact period at the estimate, and it’s worth checking against the product instruction sheet before the boxes arrive. If you’re not sure, add a day rather than skip one.
Clearing the room is almost always the homeowner’s responsibility on a residential install. Moving appliances like a fridge or washer may be listed separately, so confirm it in the written estimate rather than assuming. Furniture, wall art, rugs, and anything breakable should be relocated to another part of the house before the crew arrives. Anything left in the room adds time to the job.
Yes. The house should be at normal living temperature, typically around 70 degrees, for the whole acclimation and install period. Leave the system running through the working days and for several days after the install, even if the room is empty. An empty Boulder City house with the air off can climb well past 100 inside in summer, and an overheated room is one of the most common reasons a floor doesn’t lay down cleanly. Keep windows closed too, both for temperature and to keep desert dust out of the adhesive and open boxes.
Each flooring product specifies a tolerance for flatness measured over a given distance, and that figure governs. What matters is flat, not level: a floor can slope toward a drain and still be perfectly suitable. The subfloor also needs to be sound, meaning no soft spots, squeaks, or loose boards, and it needs to be dry if it’s concrete. The installer measures flatness at the estimate visit so any correction is built into the written quote rather than surfacing on install day.
You can, but doing the painting first is easier and safer for the floor. Drips on new flooring are difficult to remove, especially on tile grout or a fresh finish, and taping off an entire installed room adds cost. Have walls and ceilings painted before the flooring goes down, then touch up along the baseboard line after the baseboards are reinstalled.
Not usually. Most installs are worked room by room, and the household can stay. What you’ll need is to have the working room completely empty and the rest of the route clear, and you’ll want to plan around the loss of that room for a few days. A whole-home project or a hardwood refinish with heavy sanding is a different matter, and the written estimate will usually tell you what to expect in that case. Call (833) 842-8455 for a free estimate and to talk through what your specific household needs.
The Bottom Line
The floor itself is the crew’s problem. Everything underneath it is both of yours. Sort out acclimation, flatness, dryness, and clear access before install day, and the job moves at the pace of the estimate. Skip those and the crew spends the first half of the day solving problems that were never part of the quote. Sequence paint and baseboards correctly, keep the HVAC running, and dispose of the old floor on purpose instead of by surprise. In Boulder City, where the desert air and the summer heat work against a clean install, that preparation is the difference between a project that finishes on schedule and one that keeps climbing. If you’d rather just have someone walk your rooms with you, that’s what the free estimate is for.
Call (833) 842-8455 to schedule your free estimate. We answer 24/7. Fast dispatch from 7am to 7pm, Sunday through Friday. Our technicians have up to 11 years of experience in carpet, tile, and hardwood, and we install the floor you choose across the Boulder City area.
Written by the team at Flooring Boulder City.